
When it comes to ensuring SNMP security, SNMP community strings are of vital importance. If you don’t have the appropriate community string, you’ll be unable to access key device information across your network. This guide will explain what an SNMP community string is, how to configure and create SNMP community strings, related best practices, and how the different SNMP versions cause community string variations. It will conclude with my in-depth feature review of the best SNMP monitoring tool currently on the market – SolarWinds® Server & Application Monitor.
What Is an SNMP Community String?
How to Create and Configure SNMP Community Strings
How to Confirm a Community String
What Is an SNMP Community String?
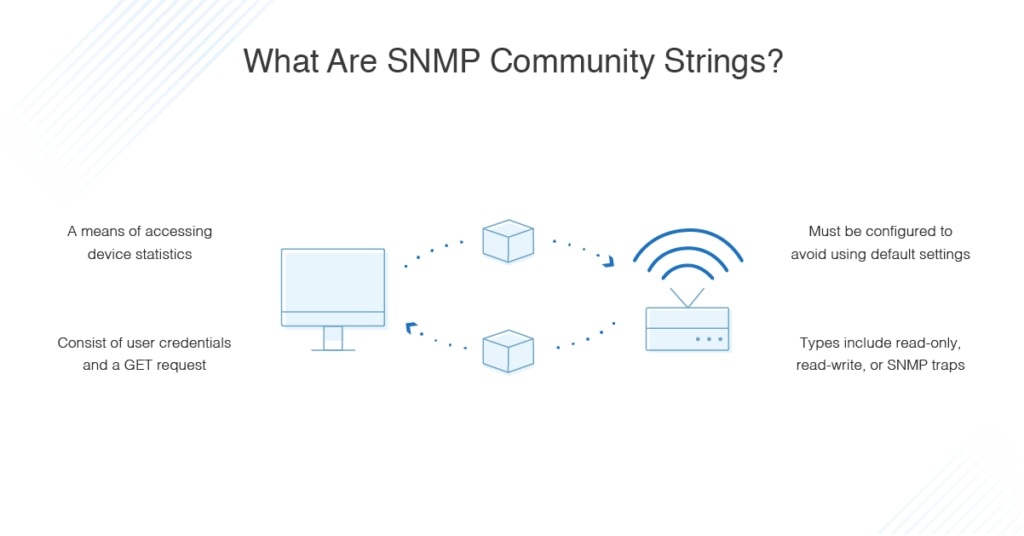
An SNMP community string is a means of accessing statistics stored within a router or other device. Sometimes referred to simply as a community string or an SNMP string, it comprises the user credential—ID or password—delivered alongside a GET request. A GET request, as its name suggests, is used to request data from a specific resource and is one of the most commonly utilized HTTP methods.
With the appropriate community string, a device is able to access data stored on other devices. If the community string is incorrect, the device will disregard the GET request. This is why it’s important for the SNMP community string to be correct.
A device will usually feature a default SNMP community string, which is dependent on the vendor responsible for the device. Some vendors use the word “public” as the default, so it’s crucial users change the default community string to maintain device and network security. With a poor default community string, your network is vulnerable to unauthorized access. If an attacker does gain access to your devices via the community string credentials, key network information will be exposed. The attacker could even gain knowledge of potential entry points they could exploit.
There are three types of community string:
- Read-only – The read-only community string enables a device to extract read-only data from another device.
- Read-write – The read-write community string is used to extract data and alter device configurations.
- SNMP trap – The SNMP trap community string is used when an SNMP trap is sent by a device.
SNMP community strings also vary according to the SNMP version being used.
SNMP and Community String Variations
SNMP stands for Simple Network Management Protocol. The three most commonly used versions are SNMPv1, SNMPv2c, and SNMPv3. Each of these versions has a slightly different approach to community strings, as outlined below:
- SNMPv1 – SNMPv1, the first SNMP version to be released, uses community strings to restrict access. SNMPv1 utilized read-write and read-only community strings, but the data transmitted was unencrypted. This meant it was vulnerable to attacks and exploitation.
- SNMPv2c – SNMPv2c also delivers data encryptions, but it uses data types, such as 64-bit counters, not present in SNMPv1. Consequently, it’s slightly more secure than SNMPv1, but not as secure as SNMPv3. SNMPv2c uses two types of community strings: read-write and read-only.
- The read-only community string allows access to management information base (MIB) objects on a read-only basis. MIB objects comprise the data transmitted between an SNMP agent and an SNMP manager.
- The read-write community string lets users access and interact with these MIB objects, meaning they can edit configurations of SNMP-enabled devices by logging into the SNMP manager. These community strings make you vulnerable because they allow attackers to remotely interfere with your system.
- SNMPv3: SNMPv3 is the most secure version of SNMP, allowing users to fully encrypt transmissions, so they can’t be accessed or exploited by external attackers.
To summarize, SNMPv1 and SNMPv2c utilized unencrypted community strings previously vulnerable to exposure. When SNMPv1 and SNMPv2c reached the market, their default community strings were set to “public,” and they were transmitted in easy-to-read and highly insecure plain text.
Given the issues associated with both SNMPv1 and SNMPv2c, it’s highly advised you use SNMPv3 wherever possible. SNMPv3 is the most secure and safe SNMP version to use because all transmissions are encrypted.
This does not, however, mean SNMPv3 is invulnerable. To ensure maximum security, create SNMP server community strings that are strong and difficult to decipher.
How to Find SNMP Credentials
The processes for finding SNMP community strings in Windows and Linux vary. We’ll start with finding them in Windows. The simplest way to do this is to use a free tool called SolarWinds SNMP Enabler for Windows.
How to Find SNMP Credentials in Windows
Before finding the SNMP community string, you’ll first use SNMP Enabler to ensure the SNMP has been correctly installed. In this example, we’ll look at installing SNMP on Windows 7, Windows 2008 Server, and Windows 2012 R2 Server. These five steps will guide you through installing SNMP and locating community strings on Windows systems.
- Download SolarWinds SNMP Enabler for Windows. This is a completely free application.
- Once the program has installed, open it and input the IP address for the device you’d like to install SNMP on.
- You have the option of choosing several IP addresses by clicking “Import.”
- Click “Start,” and SNMP Enabler will begin checking each individual IP address, verifying whether it has SNMP enabled or not. If the IP address doesn’t indicate SNMP is installed, then SNMP Enabler will install it. In both cases, community strings will be created and configured.
- When the scan is finished, you’ll be able to view the IP addresses where SNMP has been installed. You’ll also be able to view the community string.
While SNMPv3 is more secure than the earlier versions, it’s not as widely utilized by technology vendors as SNMPv2c. As such, it’s important you also be aware of the configuration process for community strings on SNMPv2c-enabled devices.
- To configure a community string on an SNMPv2c-enabled device, input the following:
Router (config) #snmp-server community comp ro - Next, input the host receiver or SNMP manager IP address:
Router (config) #snmp-server host 10.10.10.12 version 2c TRAPCOMM - Lastly, enable the SNMP traps:
Router (config) #snmp-server enable traps
How to Find SNMP Credentials in Linux
If you want to find an SNMP community string in Linux, you’ll have to use the command line. As with Windows systems, to use SNMP community strings, you need to use previously installed and appropriately configured SNMP client. This guide is based on the use of CentOS.
To install SNMP on a Linux system using CentOS, use the following command:
yum -y install net-snmp-snmp-utils
The SNMP configuration file will establish the community string and the traffic type to be monitored. The configuration file appears under the name snmpd.conf and is usually located in the /etc/snmp subdirectory.
It’s important to note there are numerous ways of finding community strings, according to the hardware being used. The following example will explain how to find SNMP community strings on a Cisco IOS-based catalyst switch or a Cisco router.
- Telnet this command to the router:
prompt#telnet 172.16.99.20 - Input the enable password, which will launch the enable mode:
Router>enable
Password:
Router# - Display the configuration as it runs, then scan for SNMP data. If unsuccessful, go to the next step. If successful in identifying an SNMP command, you’ll need to modify or disable it:
Router#show running-config
Building configuration…
… .
… . - Input the configuration mode:
Router#configure terminal
Enter one configuration command per line, ending with CNTL/Z.
Router (config) # - Enable the read-only community string:
Router (config) #snmp-server community public RO - Enable the read-write community string:
Router (config)#snmp-server community private RW - Return to the main prompt by exiting configuration mode:
Router (config) #exit)
Router# - Save the settings to RAM:
Router#write memory
Building configuration…
[OK]
Router#
How to Create and Configure SNMP Community Strings
To effectively create SNMP server community strings in Windows, configuration is key, and the process varies depending on which version of Windows is being used. The following instructions are based on configuring a community string and SNMP agent in Windows 2003, Windows 2008 R2, and Windows 2012.
How to Configure SNMP Community Strings in Windows 2003
- Use Remote Desktop to log in to your server.
- Click “Start,” “Control Panel,” “Administrative Tools,” then “Computer Management.”
- Click “Services,” “Applications,” and “Services” again.
- Move your mouse to the SNMP Service option and double-click.
- Visit the tab labeled “Security” and input your connection string.
- Verify the connection string is read-only.
- Click “Add.”
How to Configure SNMP Community Strings in Windows 2008 R2
- Use Remote Desktop to log in to your server.
- Click “Start,” “Administrative Tools,” then “Server Manager.”
- Click “Features,” then “Add Features.” At this stage, verify all the correct SNMP services have been installed.
- Click “Configuration,” then “Services.”
- Right-click on “SNMP Service,” then click “Properties.”
- Visit the tab labeled “Security” and input your connection string.
- In the SNMP Service Configuration field, ensure the Community Rights field is set to read-only.
- Click “Add.”
How to Configure SNMP Community Strings in Windows 2012
- Use Remote Desktop to log in to your server.
- Click “Windows Key,” “Administrative Tools,” then “Server Manager.”
- Click “Manage,” then “Add Roles and Features.”
- Click the “Next” button four times. This will bring you to a page where you can ensure the SNMP service has been correctly installed, under the “Features” view.
- Click “Cancel.”
- Click “Windows Key,” “Administrative Tools,” then “Services.”
- Go to “SNMP Service” and right-click, then click “Properties.”
- Visit the tab labeled “Security” and input your connection string, which should be between eight and ten characters in length.
- Check the SNMP Service Configuration field to verify the connection string is set to read-only.
- Click “Add” and the process is complete.
The process for configuring community strings in Linux is different. The following examples are based on configuring community strings in RedHat/CentOS and in Debian/Ubuntu.
How to Configure SNMP Community Strings in RedHat/CentOS
- Enter this command to begin installing the RPM:
Yum install net-snmp - Install snmpwalk to assist with the troubleshooting process:
Yum install net-snmp - Move the default config file and make it a backup:
Mv /etc/snmp/snmpd.conf /etc/snmp/snmpd/conf.original - Input a new SNMP community into the new configuration file:
Echo “rocommunity notpublic”>/etc/snmp/snmpd.conf
How to Configure SNMP Community Strings in Debian/Ubuntu
- Enter this command to install the snmpd package:
Apt.get install snmpd - Locate the snmp.conf file and back it up:
Mv /etc/snmp/snmpd/conf /etc/snmp/snmpd.conf.org - Enter the following, replacing “blank” with the community string you are using, to create the new snmpd.conf file:
Echo “rocommunity blank”>/etc/snmp/snmpd.conf - Modify the file:
Nano /etc/default/snmpd - Locate and comment out the following:
SNMPSDOPTS=‘ -lsd -Lf dev/null -u snmp -p /var/run/snmpd.pid’ - Add this line:
SNMPDOPTS=‘ -Lsd -Lf /dev/null -u snmp -I -smux -p /var/run/snmpd/pid -c /etc/snmp/snmpd/conf’ - Save and close the file.
- Enter this to restart the snmpd:
/etc/init.d/snmpd restart
sysv-rc-conf snmpd on
SNMP String Best Practices
Remember, community strings are like passwords. The more complex the SNMP string, the less vulnerable and easily exploited it is. It’s for this reason the most important best practice for using community strings is to ensure they are difficult to guess. This crucial practice is also one of the most overlooked aspects of community string configuration.
To make a community string as difficult to guess as possible, follow these practices:
- Ensure your community strings utilize at least 20 characters.
- Utilize a combination of uppercase and lowercase characters, in addition to numbers and symbols.
- Avoid using words found in a dictionary.
- Do not use any personal information, like birthday or middle name, in the community string. It’s surprising how easily attackers can access our personal information, so community strings relying on this info are easily exploited.
- Ensure private and public community strings are completely different.
- Choose a different community string for each of your devices.
By following these best practices, you help to keep your community strings secure. It’s important to note, unlike traditional passwords, an SNMP won’t lock someone out if they make too many failed login attempts. This gives attackers the opportunity to make attempts indefinitely, so ensuring your community string is difficult to guess is absolutely crucial.
How to Confirm a Community String
Once you create SNMP community strings and configure them, you’ll want to confirm they’re properly established. When SNMP is operating, you can check the network manager logs to identify which devices it has received status reports from. If a device you expect to be featured is missing from the list, this could be because the community string wasn’t properly established, resulting in the device refusing the GET request. By checking the list, you’re able to identify any failed community string configurations, so you can rectify them.
Best Tool for SNMP Monitoring
Monitoring with SNMP allows you to gain a comprehensive view of your network and connected devices. My favorite tool for the job is SolarWinds Server & Application Monitor (SAM). SAM offers SNMP monitoring as part of an impressive range of capabilities, covering application monitoring, server capacity planning, custom application monitoring, application dependency mapping, Azure monitoring, and more.
One of the major benefits of this tool is its versatility: it’s truly an all-in-one solution designed to mitigate the need for other programs, allowing you to monitor all your apps and servers through a centralized view. I’ll start with an overview of the tool before getting into its application for SNMP monitoring.
Feature Overview of SolarWinds SAM
SAM includes more than 1,200 integrated monitoring templates for applications and systems, allowing you to massively extend your monitoring processes. The software also features more than a thousand monitoring templates across your public, private, and hybrid cloud environments. These templates are ready to use on an out-of-the-box basis, giving you continuous server monitoring, the flexibility to monitor custom apps, and cross-stack correlation for hybrid IT data.
SAM offers predefined operating system templates to help ensure your applications and servers experience minimal downtime and operate at peak performance levels. These templates make SAM highly suitable to beginners, providing support to users who are unsure where to start with their monitoring processes.
This tool lets you create specific monitors for any service or process, whether on-premises or in the cloud, with out-of-the-box support for multi-vendor applications. This means you can extend your monitoring and reporting operations with PowerShell, APIs, and scripts.
Furthermore, SAM allows you to gain full visibility of your Office 365 usage by monitoring, alerting, tracking, and reporting on the software’s availability and how it’s being used. Built-in server monitoring templates assist with implementing best practices.
In addition to its Windows compatibility, this program is suitable for monitoring Linux servers. It comes with predefined Linux monitoring templates designed to monitor Linux servers and applications and assist with rapid performance issue troubleshooting.
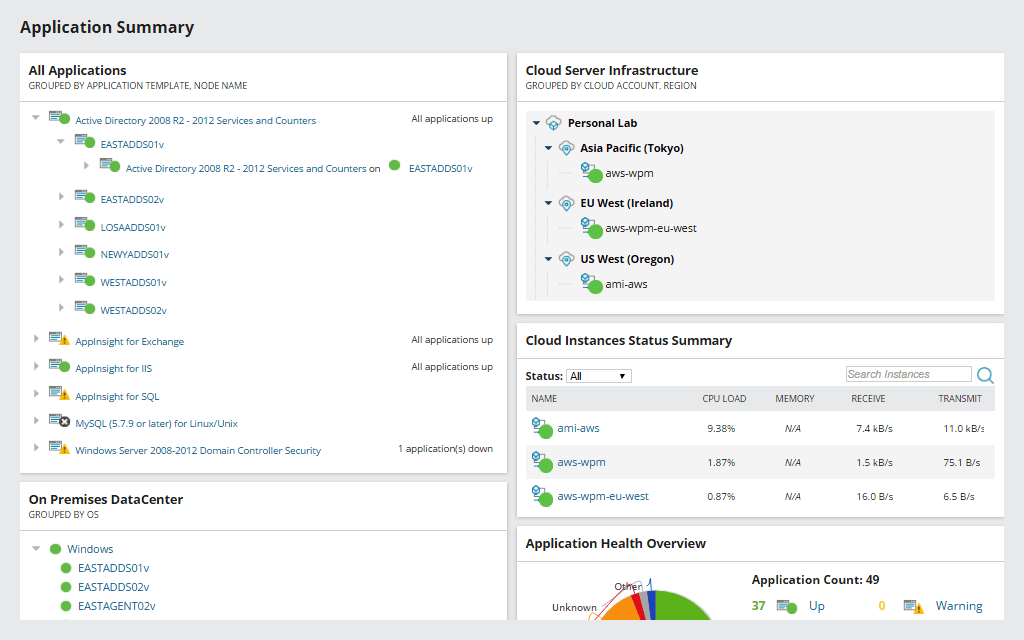
One of the best features of SAM is the dashboard, which is uncluttered and dynamic, allowing you to focus on key metrics and prioritize the monitoring elements most important to you. The program displays data graphically wherever possible. This facilitates at-a-glance data interpretation, speeding up data analysis and making it more accurate. In fact, the dashboard is so easy to use there’s no learning curve associated with getting started. With the templates and the simple installation process, you could be monitoring effectively within a matter of hours.
SNMP Monitoring With SolarWinds SAM
SAM features an SNMP monitor designed to offer maximum vigilance with minimum effort on your part. The following instructions explain how to manage an SNMP agent on a monitored system failing to respond. If this occurs, monitored elements will no longer be updated, and their status will either change to “unknown” or maintain the last known response. In either case, this inaccuracy lowers the overall quality of monitoring operations and could potentially create vulnerabilities.
To use SAM to increase monitoring vigilance, follow these simple steps:
- First, you will need to create a template. Go to “Settings,” “All Settings,” “SAM Settings,” then “Manage Templates.”
- Next, click “Create New Template.”
- Change the name of the template to “SNMP Monitor.”
- Click on “Add Component Monitors.”
- Conduct a search for “SNMP.”
- Select the SNMP Monitor and click “Add.”
- You will be asked to input the monitor’s object identifier (OID). Enter “1.3.6.1.2.1.1.3.0” then click “Submit.”
- Go to the “Application Monitor Templates” tab and search for “SNMP.”
- Click on the SNMP Monitor template and then click “Assign to Node.”
- Assign the template to the appropriate nodes. This template should only be assigned to nodes using ICMP and SNMP polling.
Once you’ve created the template, the next step is to set up the alert:
- Go to “Settings,” “All Settings,” then “Manage Alerts.”
- Click “Add New Alert.”
- Change the alert’s name to “SNMP Monitor Is Not Up” and click “Next.”
- Establish the trigger conditions as follows:
I want to Alert on: Component.
Actual trigger conditions: All child conditions must be satisfied (AND)
Application name is equal to SNMP Monitor
Component availability is not equal to up
- Click “Next” repeatedly until you reach the “Trigger Actions” tab.
- Set up an email action with required settings.
- Click “Next” twice more, then click “Submit.”
Establishing this template and the associated alerts means you’ll be emailed if the SNMP Monitor fails to get a response, because it’ll no longer be in an “up” state.
SolarWinds SAM also features SNMP Walk Tool, which allows you to collect MIB walk data. This enables you to troubleshoot server issues and collect SNMP walk data if you’re experiencing volume, memory, or CPU problems with a node.
Get Started SNMP Monitoring
SNMP community strings function as credentials triggering access to device information. Incorrect community strings mean GET requests are ignored. SNMP monitoring with SolarWinds Server & Application Monitor helps to ensure consistent performance and alerts you to issues as they arise.
SAM is a comprehensive monitoring tool offering advanced utilities combined with an easy-to-navigate interface. The SNMP monitoring capabilities are simple to use, comprehensive, and intuitively designed. The software also serves as a solution to your wider server and application monitoring needs.
SAM, like all SolarWinds products, comes with a vast community of loyal users, where you can get further advice and support. It is also designed to be highly scalable, so it’s suited both to a small-scale environment and to business-grade usage. A 30-day free trial is available.