
The subnetting tutorial below contains key tips for the process. After outlining what IP addresses are and how they work, we’ll take a look at what subnetting is. I’ll cover key components and processes such as subnet classes and subnet masking and organizing and managing subnets. All of the concepts in this subnetting guide are broken down into small parts, to make this topic as digestible as possible.
What is Subnet?
What Is an IP Address?
What Is an IP Class?
Subnet Mask Cheat Sheet: What Is Subnet Masking?
Using Subnets to Organize and Optimize Your Network
Subnetting Tutorial: 4 Commonly Asked Questions
Best Subnetting Tool
What is Subnet?
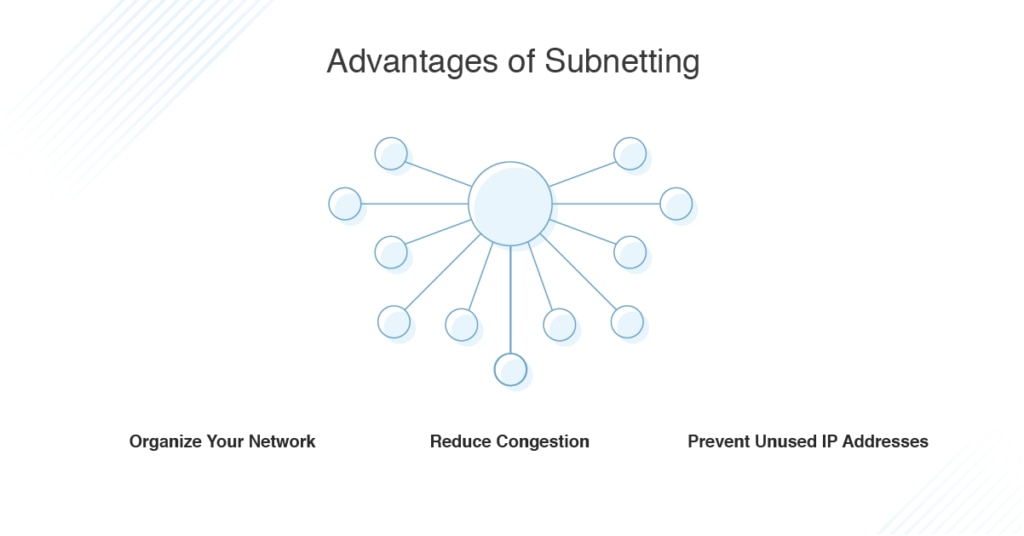
Subnet offers a way of organizing your network to help to reduce network congestion. When you have a lot of traffic flowing between particular parts of your network, it can help to group those parts in a single section, so the traffic doesn’t have to travel across the entire network to get from place to place. Separating out small parts of your network into subnets allows traffic to flow more quickly and to avoid taking unnecessary routes, adding traffic where it isn’t needed.
In addition, subnetting helps in efficiently allocating IP addresses and prevents large numbers of IP addresses from going unused. Subnets are usually set up geographically for particular offices, or for particular teams within a business to allow their network traffic to stay within the location.
What Is an IP Address?
Before we can start to understand how subnets work and how to manage them, it’s important to have a strong grasp on how IP addresses work. An IP address is essentially an identifier for any device connected to a network. There are two kinds of IP address: IPv4 (version 4) and IPv6 (version 6).
An example of an IPv4 address is:
| 216.27.61.137 |
An IPv4 address uses 32 binary bits to express the identifier of the device. To make the binary bits expression easier to understand, the 32 bits are split into four groups of eight, and then each group is turned into a decimal number. These four groups are separated by a dot, as you can see in the example above.
IPv6 addresses are made up of 128 binary bits. These bits are separated into eight groups, and each group is separated by a colon.
An example of an IPv6 address is:
| 2001:cdba:0000:0000:0000:0000:3257:9652 |
In normal use, the groups consisting entirely of the number zero are removed and replaced by a colon to shorten the IP address for ease of use.
IPv6 was created because 232 combinations were possible in IPv4, allowing up to 4.3 billion unique IP addresses. As the internet and number of devices grew, new combinations of numbers became necessary. IPv6 allows up to 2,128 combinations, which has expanded the number of possible unique IP addresses significantly.
IP addresses can be shared with one other device, multicast to multiple other devices, or broadcast to everyone—in other words, public. IP addresses can also be dynamic or static. A static IP address means a particular device has an IP address assigned to it, which doesn’t change. A dynamic IP address means when a device joins a network it’s assigned an available IP address, which could change each time the device connects.
What Is an IP Class?
Now that we’ve looked at what an IP address is, the next thing to consider is IP classes, as these are essential for understanding how subnets work.
Say you’re trying to find one particular IP address, or organize IP addresses on your network. This would be an impossible task without some kind of system. IP addresses are divided into numerical sections to help you find what you’re looking for more quickly. These sections are called classes. IP addresses are divided into three classes: A, B, and C.
- Class A: IP addresses are those between 0.0.0.0 and 127.255.255.255.
- Class B: IP addresses are those between 128.0.0.0 and 191.255.255.255.
- Class C: IP addresses are those between 192.0.0.0 and 223.255.255.255.
If you’re trying to determine the class of an IP address, you need to look at the first number. If the first number is 1 through 127, it’ll be a class A address. If the first number is 128 through 191, it’s a class B address. Finally, if it’s 192 through 223, it’s a class C address.
Depending on the IP address class, different portions of the IP address are used to designate the network and the host. For example, class A only uses 8 bits of the IP address for the network, leaving 24 for the host. So, using the example 126.27.61.137, the network IP address would be 126.0.0.0 and the host address would be 0.27.61.137.
For a class C address, 24 bits are used for the network, and eight remain for the host. Using 200.23.65.1 as an example, this would result in 200.23.65.0 for the network and 0.0.0.10 for the host.
For networks such as a TCP/IP network to function, the routers passing information throughout the network don’t need to know the exact host address. They only need to know the network portion of the IP address; then, once the packet is delivered to the host’s network, it can get to the right host.
Subnet Mask Cheat Sheet: What Is Subnet Masking?
Each IP address class has a matching “subnet mask,” which is an easy way of identifying which part of the IP address relates to the network and which part relates to the host. This is essential to ensure packets traveling through the network get to the right place.
The default matching subnet masks for each subnet class are as follows:
- Class A: 0.0.0
- Class B: 255.0.0
- Class C: 255.255.0
When we look at the subnet masks and convert the decimal numbers back into binary, we can see which bits of the IP address are allocated to the network and which are allocated to the host.
In binary, 255 is 11111111, and 0 is 0.
So a subnet mask of 255.255.255.0 would be converted to:
| 11111111.11111111.11111111.0000000 |
When you match this with an IP address, such as 192.168.123.132, you can determine the network portion and the host portion of the IP address. Each “1” in the subnet mask exists for the bit portions of the IP address allocated to the network, and each “0” exists for when a bit portion is allocated to the host.
Here is an example:
| 11111111.11111111.11111111.0000000 | subnet mask |
| 11000000.10101000.01111011.10000100 | IP address 192.168.123.132 in binary) |
This means the network portion of the subnet is 192.168.123, and the .132 is allocated to the host. When information arrives on the 192.168.123.0 network, it’ll be processed as part of the network and then delivered to the 0.0.0.132 host.
Using Subnets to Organize and Optimize Your Network
Essentially, a subnet is a smaller portion of the network within class A, B, or C. Creating and using subnets can help to keep your network organized and functional.
Example of subnetting in 3 steps:
- Hypothesis
Let’s suppose a business wants to use four different IP address blocks for the different segments of its network, with 50 hosts per segment. The business uses the following IP address blocks:
| 200.1.0.0 |
| 200.1.1.0 |
| 200.1.2.0 |
| 200.1.3.0 |
2. Goal
Each IP address block can create 254 IP addresses, which allows 254 x 4 total IP addresses to be created for use in the network. This amounts to 1,016 IP addresses. But the business only wants 50 hosts on each block, so it’ll have 816 IP addresses that don’t get used at all. This is a waste of IP addresses that could be used by other devices. Subnetting is a way to divide an IP address block into smaller portions, so fewer IP addresses are wasted.
3. Execution
We know for the first IP address, 200.1.0.0, 200.1.0 is the network portion, and .0 is the host portion. The full IP address in the 32 binary bits would look like:
| 11001000.00000001.00000000.00000000 |
But we know we don’t need all 254 hosts created by this IP address block, so we can borrow some of the host “bits” to create a new “subnetwork,” or subnet.
Using the 11001000.00000001.00000000.00000000 example, we would borrow one “bit” from the host portion to create a subnet.
So:
| 11001000.00000001.00000000.00000000 |
would become:
| 11001000.00000001.00000000.10000000 |
As a result, the new decimal IP address would become:
| 200.1.0.128 |
Borrowing this one bit from the host portion of the IP address still leaves seven bits in the host portion. Seven bits in the host portion allow 128 IP addresses to be created, which is still more than enough for the business’s needs. If we follow through the process and borrow another bit from the host portion of the IP address, four subnets can be created:
| 11001000.00000001.00000000.00000000 | 200.1.0.0 |
| 11001000.00000001.00000000.01000000 | 200.1.0.64 |
| 11001000.00000001.00000000.10000000 | 200.1.0.128 |
| 11001000.00000001.00000000.11000000 | 200.1.0.192 |
These four subnets allow 64 IP addresses to be created, and there’s far less wastage than in the example above.
There are two hosts reserved for the IP addresses needed for the network identity itself (the first IP) and the broadcast address (the last IP). So for each IP address block, only 12 IP addresses are wasted.
This is where subnet masks come back in. If you’ve “borrowed” bits from the host portion of the IP address, it can be hard to tell where the network portion ends and the host portion begins. With a subnet mask, you can specify which portions of the subnet are the network and which portions are the host.
For example, for the IP address 200.1.0.64 created above, the subnet mask would be:
| 11111111.11111111.11111111.1100000 | subnet mask 255.255.255.192 |
| 11001000.00000001.00000000.01000000 | IP address 200.1.0.64 in binary |
The “11” at the beginning of the final portion of the subnet mask, resulting in the “192” portion, shows the first two bits of the host portion of the IP address belong to the subnet, instead of the host.
Subnetting Tutorial: 4 Commonly Asked Questions
Building on this understanding of subnets and how they work, the following subnetting cheat sheet will address how to navigate, understand, and manage them.
1. How Many Hosts Can You Have in Your Subnet?
Determining how many hosts you can have in your subnet is important, as you don’t want to end up with a subnet too small to host all the IP addresses you need, or one too large and resulting in a lot of wastage.
You can figure out how many hosts you can have in your subnet by subtracting the number of network bits from the number of total bits: in other words, 32 total bits, minus the number of network bits. Let’s use 26 as an example.
A subnet with 26 network bits has six bits available for the host IP addresses. You then also need to subtract 2 IP addresses for the network IP itself and the broadcast address.
So, the formula is as follows:
| 2^32-26 – 2 = 2^6 – 2 = 62 |
You can use this with any number of network bits to determine how many bits you have available to create hosts for your subnet.
2. How Do You Know What Subnet an Address Is On?
You also might want to quickly determine the subnet a given IP address is a part of.
Let’s look at the IP address 156.67.154.75/28. First, you need to determine how many of the bits are allocated to the network and how many to the host. We already know, in this IP address, 28 are used for the network and four are for the host.
Then, you need to determine how big the subnet is, by taking the number of bits allocated to the host, and raising 2two to the power of that number. In the above example this is 2^4, or 16. This is called the “block size,” because it refers to the size of the subnet blocks into which the network has been divided. You can use this block size to count up from zero to determine which subnet block the IP address belongs to.
For 156.67.154.75, you would start at 156.67.154.0 and go up by 16 at a time, as follows:
| 156.67.154.0/28 |
| 156.67.154.16/28 |
| 156.67.154.32/28 |
| 156.67.154.48/28 |
When counting further up, you can see 156.67.154.75 falls in between the two subnet blocks:
| 156.67.154.64/28 |
| 156.67.154.80/28 |
This means the 156.67.154.75 IP address is in the subnet beginning with 156.67.154.64, because .80 would be too high.
This can take a bit of practice. Just remember to first determine the number of bits in the IP address allocated to the hosts, then take the number two and raise it by the number of bits allocated to hosts. Whatever number you get is the block size, and you can then count up within the IP address by the block size, until you find two blocks the IP address falls between. The IP address is in the lower subnet of those two blocks.
3. How Do You Determine Whether Two Addresses Are in the Same Subnet?
You may want to figure out whether two addresses are in the same subnet. The first step in doing so entails determining the size of the subnet block. Then, you calculate the valid host range to see if the second address falls within the same range.
Here’s an example of this process, using the following two IP addresses:
| 10.21.45.137/13 |
| 10.23.156.198/13 |
You can see the number of network bits is 13, which means the subnet must be set up in the second octet, or the second part of the IP address.
So, we can begin with the IP address 10.0.0.0/13.
We can also determine the subnet block size, by taking the number of bits allocated to the host and raising two to the power of that number. So, with a maximum of 16 bits in the first two octets, the subnet block size is 2^(16-13) = 8.
You can then work through the subnet blocks, increasing by eight at a time:
| 10.0.0.0/13 |
| 10.8.0.0/13 |
| 10.16.0.0/13 |
| 10.24.0.0/13 |
Since 10.21.45.137/13 and 10.23.156.198/13 are both between 10.16.0.0/13 and 10.24.0.0/13, they are both on the same subnet.
4. What Tool Can I Use for Managing Subnets?
One way to simplify the process of managing your subnets is by using a tool. My recommendation is SolarWinds® IP Address Manager (IPAM), which has several features to automate and streamline this process.
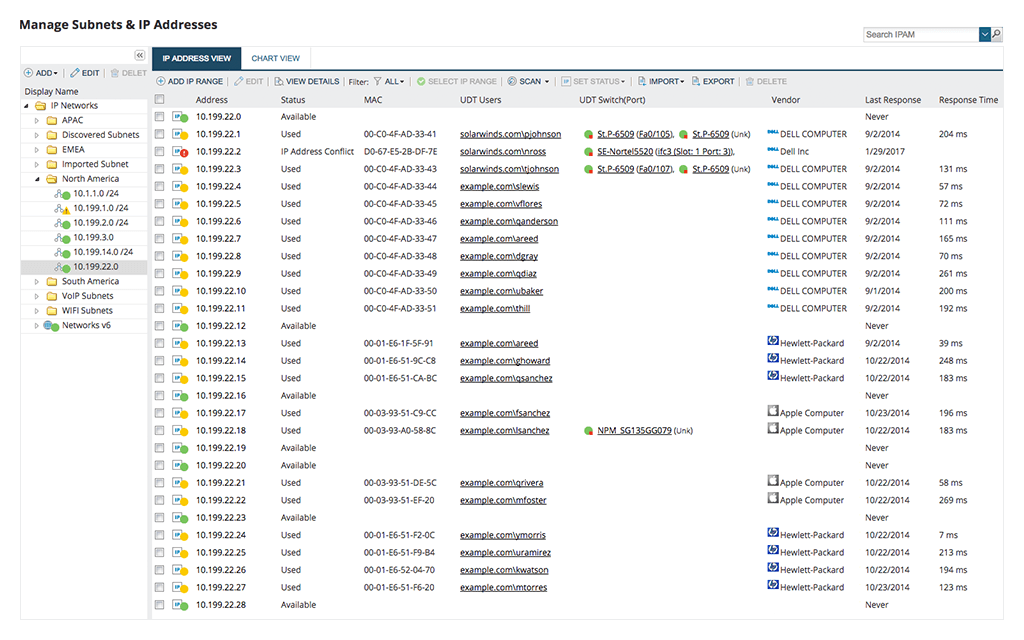
SolarWinds IP Address Manager includes:
- an automated subnet discovery wizard – allowing you to discover and collect information on all of your subnets, showing you which IP addresses are part of each one,
- a subnet allocation wizard – which looks at the traffic and size of your network, and then optimizes your IP addresses into subnets suiting your needs. The interface allows you to group and organize your subnets and IP addresses in a way that makes it easy to find the information you need,
- ability to simply select a network, group, or supernet you want to subnet.,
- easy-to-use interface – you can choose to name the subnet, give it an address, and give it custom properties if you want. This simplifies the subnetting creation process and helps you to customize and organize your subnets from the outset,
- intuitive dashboard showing you the scope of your IP subnet and its utilization and can create alerts to let you know when a subnet is getting full or when you have a subnet with a huge amount of unused space. Using the IP address view, network view, or chart view, you can gain different perspectives on how your network is functioning and how your IP addresses are allocated. This can help you to optimize your subnets and reduce IP address wastage.
Best Subnetting Tool
I hope my subnetting guide has given you a greater understanding of subnetting. This article has covered how subnets work, the core concepts behind them, and the basics of subnetting. It has also answered some key questions about issues with subnets and looked at how tools can help you to manage your subnets more easily. My recommended tool for this purpose is SolarWinds IP Address Manager, a robust software enabling you to allocate IP addresses into subnets, and monitor and manage them, with efficiency. A 30-day free trial lets you try the fully functional program without risk.